
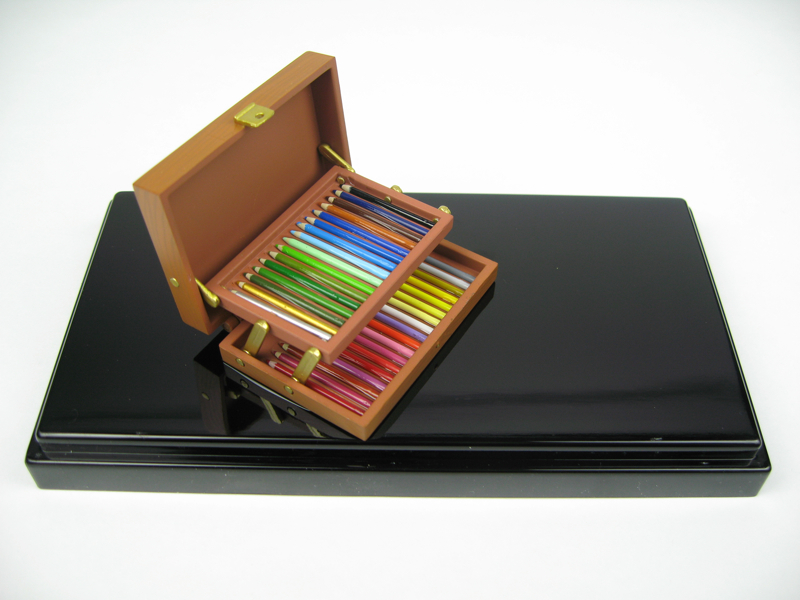
Thank you for Pricilla for permitting me to use this photo!
To learn more about Re-ment secrets, go to my favourite Re-ment source:
To learn more about Re-ment secrets, go to my favourite Re-ment source:
*Priscilla's Treasures* and see her Secret Sets Archive
Its to die for, but even if you would have a couple extra hundred buck lying around, its not always there to get it. Well, I don´t have that sort of money, but I do have paints and toothpicks, so here is how to make a porr man´s version of the highly desired item!
My version finished:

Ok, lets get started. What you´ll need for this tutorial is:
- Average round toothpicks
- Acrylics paints and a small brush
- Sharp hobby knife
- Sand paper or sand paper nail file (work´s wonders!)
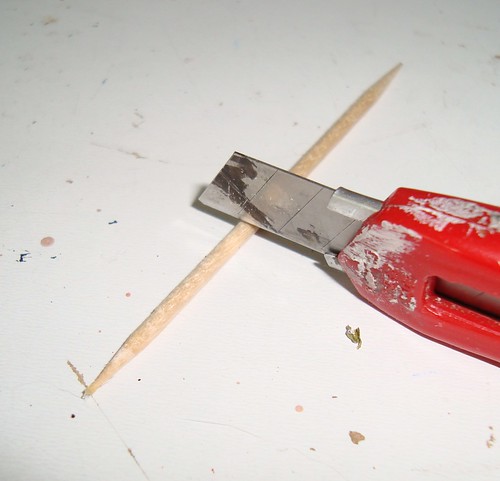
What we go first is take a toothpick, measure suitable length of it and cut it. 1/3 is ok, but I like to vary the length so that the pencils appear to be used - favourite colours being shorter of course. You need a sharp knife for cutting and better than snapping the toothpick with one cut is rolling the knife around the wood making the cut gradually deeper so there´ll be no splinters.
Take sand paper or a nail file - I´m using the later and it gives more precicion with tiny carvings. For this tutorial, how ever, either will do. Sand the cut end of the toothpick smooth. Keep it on 90 degree angle to get a flat end.

Also smooth the edges after sanding the end as too rough sanding may also cause splinters. If you want really perfect surface without any texture, moisture the wood first, let dry and then sand the whole thing. Moisture will make the wood grains stand up so when you paint with wet paint the surface will turn uneven.

Now, take the paint of your choice and be careful not to use too wet paint. Paint the sharp end of the toothpick, but don´t make it too long. Its important to leave some wood showing between the body and the sharp end.

After letting the tip dry (this should take no time at all), carefully paint a line to the sharp end just where is starts to get narrower.
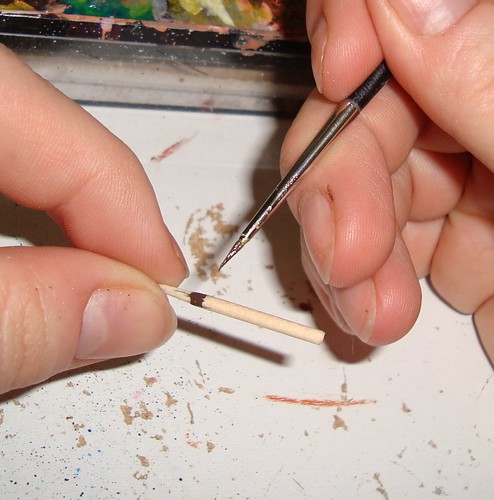
Then fill the full body with paint until the tip. Its better to hold the pencil until it dries or you might smudge the paint.

I prefer to put a thick layer of gloss varnish to the brown body - do not varnish the sharp tip or bare wood or it will look less realistic. If you have a steady hand you can also scribble a pencil brand like Faber-Castel or something on the side. Now just repeat the process to make as many colours as you like. I also folded a box for my set out of copy paper.
Here is the finished set in my diorama.
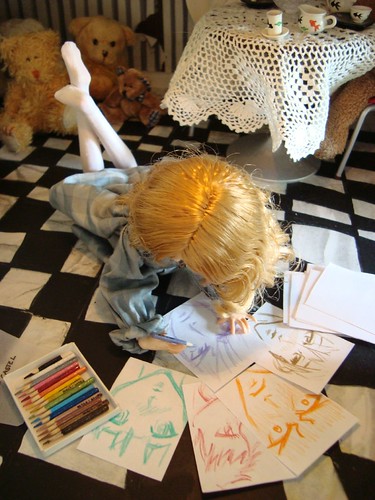
Enjoy!
5 comments:
I am reading for the first time today since someone posted a link to your great blog. Thanks so much!!! Trish
Great idea!
wow,,,nice ideas you shared... thank you....i really appreciate it...
beware to be a victim...
bestessays scam
thanks,
badloi
nice art of yours.
you really have a gifted hands.keep it up.
astralprojectionstories
Post a Comment