Friday 15 May 2009

Photo Story - The Nerd

I just finished my newest photo story The Nerd. The whole thing began when my old cell phone died and me and Juhana - my spouse - decided to take it apart and, if you allow me use Finnish idiom, "see what it had eaten". We spend the best part of last Sunday afternoon mutilating the poor devise and I was surprised by the microscopic scale of all the innards. They were so tiny they kind of worked in 6th scale too!

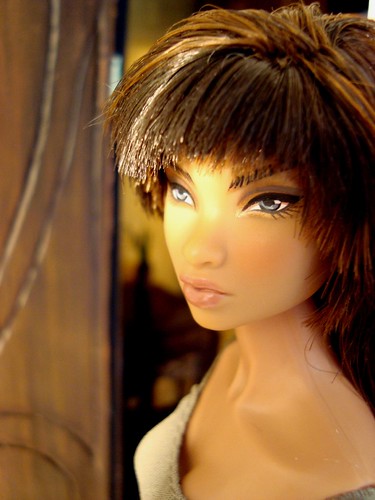
When I was in high school, I had this friend who´d always sit in his room, sleeping all days and grouching over his desk at night, putting together his dream computer from parts. He almost hated the day light and always had curtains drawn if he´d be awake in the light of day. So I get this idea of profiling my new repaint that had no name yet after him. An antisocial nerd, not always easy to deal with but I do always remember him with affection. ;)

So my FR Erin OOAK became Myong Shin, a Korean top student moved to Paris - as that's where my stories take place - with her parent who work too much and whom she never even sees. Similarly to my old friend she is messy, frank to rudeness, sometimes takes things only as literally as a brilliant mind with no social capabilities can, jealous over her stuff and loves junk food. 

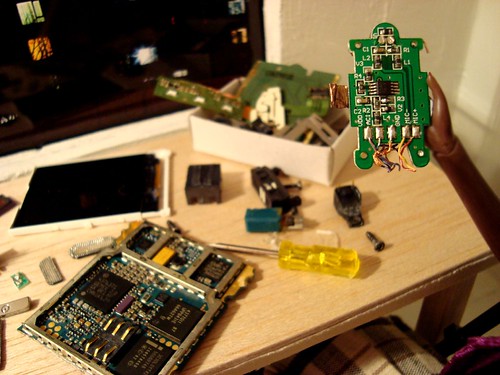
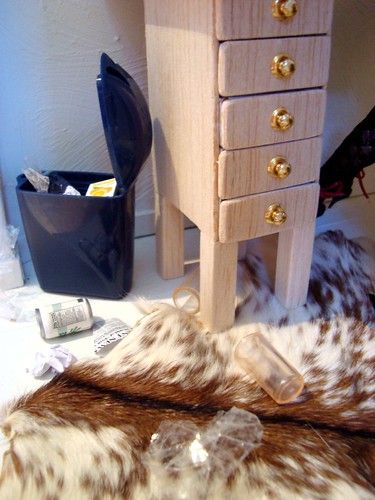
The original idea of the diorama had nothing but a desk in a dark room full of my old cell phone parts, but I wanted to make the room more whole. Its still needed to be crammed but also give a tiny hint that this was in fact a girls room and not the layer of an old treckie going bold and still living with his parent - although Shin really does. I decided that she only worked in the room and slept elsewhere. It gave the room more space and was reasonable as the dust from bedding is not good for electronisc.

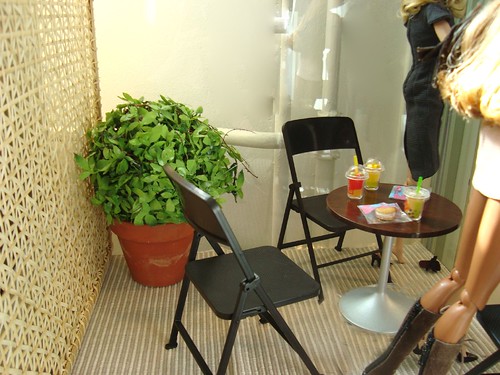
So, as you can see, the room became small but economical, nothing extra, just the basics. I wanted to put a foldable chair to the corner to indicate that she does, occasionally, have guests - not that often though. As it turns out the chair is fenced in by a horde of empty cola bottle which are essential part of any nerds room. 


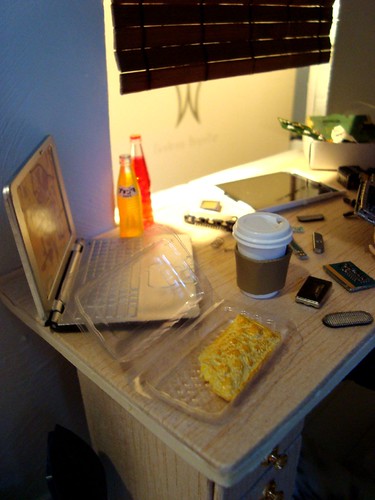
Shin does have a serious disrecard towards computer safety as she eats and drinks next to her laptop and electronics all the time. This was an aspect that always confused me in my friend, for after lecturing me about dust and such he´d eat over his key board and drop bread crums in it. Accordinly, Shin´s room and especially the desk are a mess.


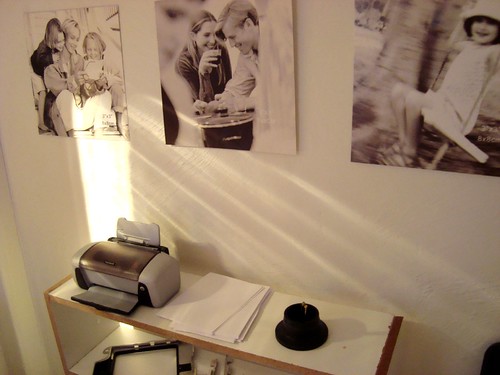
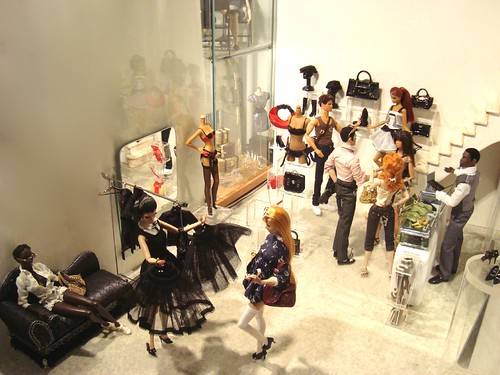
Originally, I started shooting the story in a morning sun light and I loved the general airy lighting of the scene. But then it started to rain and it rained the nect day too and I lost my lighting after only 10 story frames. So I had no choice but the change the storyline - well I suppose I could have waited until the weather changed, but I have no patience when inspired. ;) 


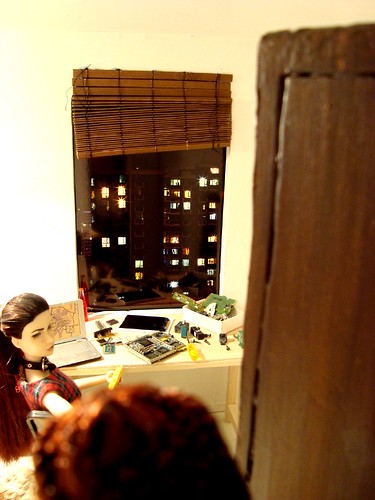
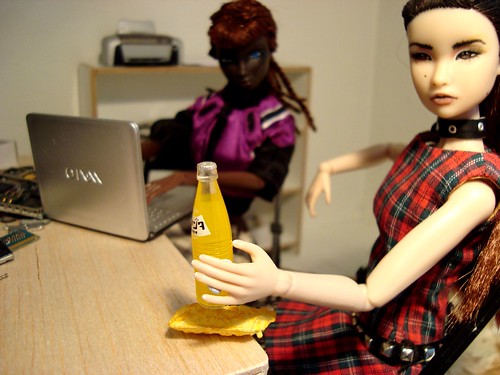
I made a change in storyline, Shin asking Morwen to come back later - her later being around midnight. The night view seen thru the window is a part of a photograph taken by Riikka Kaakkurivaara (all rights reserved) from my balcony in China, Peking. 


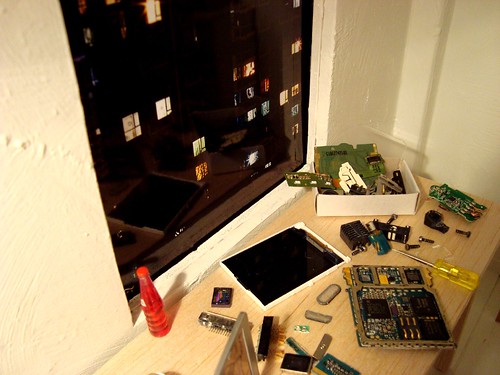
I actually like the effect the "window" gives as the glossy surface of the photo reflects the scene in fromt of it. I´ve been thinking of making windows for my doll house for ages, but now I have second thoughts as that would limit the use of interchagable backdrops like this.

The infamous Charo from the last photo story will be making an appearance too!

Remember to read the full story! :)

Thursday 14 May 2009

Obitsu 1:6 Dog Review - Updated!

This is the new Japanese Obitsu toy dog. It has huge amount of articulation and comes in 3 different colours and 2 different types. I bought the black flat eared one.


The material and joints remind me of Playmobile or Lego. The material is pretty fragile, I broke of one ear when deboxing but the poseability is really pretty good. The only down falls are that the poor thing cannot wiggle its tail sideways and cannot reach enough to lick its own balls. What sort of a dog´s life it that? ;)

The body type of the dog is pretty general so it seems to work nicely with different size 6th scale dolls. Below you can see it posing next to Momoko, Dynamite Girl, Fashion Royalty and FR Homme. It seems size is not an issue for this jolly little thing. Well worth the 25 usd.

I love how it can prance around so joyfully, it makes me easily forget its mechanical looks. However, my plan is to try and sew a stretch fabric around its frame in order to make it look a bit more real. I´ll keep you posted! And lets hope they´ll make a cat soon!

For more information see:

UPDATE:

The dog now has skin, but looks a bit weird. I can never get animals face right and the frame is quite bulky around the shoulders, but at least he is more than a skeleton now.


Tutorial: Coloured Pencils

Ok, how many of you, like me,  have always been dreaming of that illegally expensive double layers Re-ment crayons box? It is truly the holy grail of any Re-ment collector.

Thank you for Pricilla for permitting me to use this photo! 
To learn more about Re-ment secrets, go to my favourite Re-ment source: 
*Priscilla's Treasures* and see her Secret Sets Archive

Its to die for, but even if you would have a couple extra hundred buck lying around, its not always there to get it. Well, I don´t have that sort of money, but I do have paints and toothpicks, so here is how to make a porr man´s version of the highly desired item!

My version finished:

 Ok, lets get started. What you´ll need for this tutorial is:
- Average round toothpicks
- Acrylics paints and a small brush
- Sharp hobby knife
- Sand paper or sand paper nail file (work´s wonders!)

What we go first is take a toothpick, measure suitable length of it and cut it. 1/3 is ok, but I like to vary the length so that the pencils appear to be used - favourite colours being shorter of course. You need a sharp knife for cutting and better than snapping the toothpick with one cut is rolling the knife around the wood making the cut gradually deeper so there´ll be no splinters.


Take sand paper or a nail file - I´m using the later and it gives more precicion with tiny carvings. For this tutorial, how ever, either will do. Sand the cut end of the toothpick smooth. Keep it on 90 degree angle to get a flat end. 

Also smooth the edges after sanding the end as too rough sanding may also cause splinters. If you want really perfect surface without any texture, moisture the wood first, let dry and then sand the whole thing. Moisture will make the wood grains stand up so when you paint with wet paint the surface will turn uneven.


Now, take the paint of your choice and be careful not to use too wet paint. Paint the sharp end of the toothpick, but don´t make it too long. Its important to leave some wood showing between the body and the sharp end.

After letting the tip dry (this should take no time at all), carefully paint a line to the sharp end just where is starts to get narrower.

Then fill the full body with paint until the tip. Its better to hold the pencil until it dries or you might smudge the paint.

 
I prefer to put a thick layer of gloss varnish to the brown body - do not varnish the sharp tip or bare wood or it will look less realistic. If you have a steady hand you can also scribble a pencil brand like Faber-Castel or something on the side. Now just repeat the process to make as many colours as you like. I also folded a box for my set out of copy paper.


  Here is the finished set in my diorama.

Enjoy!

Saturday 2 May 2009

Photo Story - Débutante

Well, its been a while but I have a pretty good excuse for that. ;) 
It all started about a month ago, as I found these pretty kitsch acrylic photo frame sets from a local shop and instantly thought of them as shop displays. It´s funny how once you start building dioramas as a hobby, you also start seeing everything around you in scale. So, the tacky frames I wouldn´t usual touch, not to mention pay good money for, came home with me.


I had only bought the small set, but as soon as I got home and put them in my doll display case, I wanted the bigger set too. The small one seemed perfect for shoes and bags an such, but the squares were definitely too small for boots and an idea of a huge boutique diorama was starting to for in my head! I went back and bought the bigger set too.


The idea I had was this huge and modern upper class department store type store for fashions and accessories. I didn´t have a table big enough for it, so I decided to build in on the floor next to my doll showcase that was impeded into the diorama as a window display. The walls consisted mainly of empty FR doll boxes - its a material with a nearly endless supply in this household. ;) I also temporarily decapitated one of my Model Muse barbies, and found another poor soul that had been experimented on from the bottom of my zombie barbie drawer. They made great mannequins for the shop and since they are even skinnier than FR I had this fun idea to make an FR doll complain about the unrealistic images of beuty they created! LOL!
Then there was the shop counter to be made and making dioramas is all about scavending your environment for stuff that is easily turned into something else. And as I said before, it becomes new new of seeing things all together.
The counter is a Misaki doll box balanced on its place with bluetag. On top of it, two jewellery glass boxes as display cases for smaller and more valuable merchandise and a plastic cash register from a cheap pirate barbie toyset I bought from a supermarket. The marble staircase is the same one I made ages ago for my doll house and the round acrylic stand for shoes and vase is my spouse´s pencil cup. 
NOTE: Among the pictures above, in one on the left you see a doll walking up the stairs pasts the wall display. Can you imagine how precarious it was balancing that doll there, without a stand and the wall display levitating there with nothing more that couple of sewing needles! Man, how many times it fell and created a nice domino effect. Sigh. All the other dolls were on stands, but that mean erasing them with photoshop from all the 170 pictures!
As you can propably quess by now, my diorama was quickly turning into a photo story. It just seemed that the dolls has a life of their own and I thought it would be fun to write so dialogue to bring out their personalities.
 
The story was suppose to revolve around these two characters: Charo and Tori, who are simply out shopping for a début outfit for Charo who is very much not interested in the whole business. The story actually begins with Charo complaining about the high heeled shoes Tori lend her as she would have preferred her own military boots for comfort. Her general lack of interest and fashion sense keeps agravating Tori through out the story line. But as I brought in more characters as extras, they started to demand attention for their own and soon my "little" diorama project had swelled into a 1700 file pile of photos.
 
 Along the way I had to introduce more and more characters such as the emotionally unstable Akito Yuri and her friend of a mother hen Sophie York. As one can imagine, a diorama build from loose boxes in a house with three cats it about as stable as a snowman on June, so I felt that if I wanted to share this fun it had to be done now or never. So I called my friend Marika - it was around 6 p.m. I think and she rushed to my house right away - and as always, with visitors. Marika´s tourists (in the middle) also wanted their part of a story and as 5 more of my dolls entered the scene I had to build the diorama even bigger.
 
In the earlier picture above the diorama ends right there with the left edge of the photo. As in the one below, more wall has been build and a lounge added to accommodate all the dolls in one scene.
 Originally, I hadn´t planned for thse sort of wide scale picture to be taken at all and it was now I realised that the second shelf of my doll display case was showing  (you can see legs of dolls sitting there) so I decided to write it into the story line. In the end of the story, the ladies in the "upstairs café" abandon their seats and take interest in the happenings below in the boutique.
 
So, that´s what I´ve been up to these days. It took me about a month to finish this photo story but here it is, finally. If you want to read the whole 170 page epic, click here