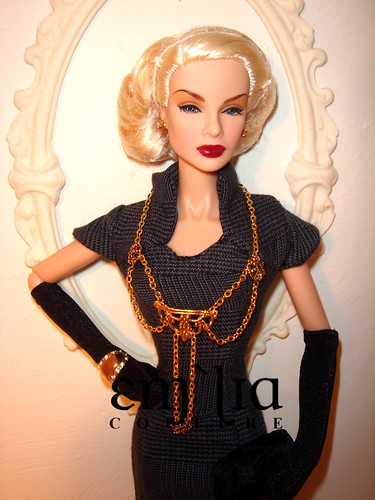
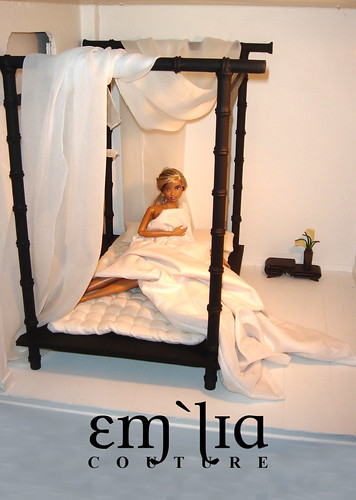
This has nothing to do with my doll house, really, but I want to share this project with you anyway. It has, of course, still something to do with dolls, or a single doll more like - let me present Her Grey Eminence Vanessa!

This Vanessa doll is the first one in my FR collection. I bought the doll completely blank with not face or hair and transformed her into a complete and luxurious OOAK gift set. Its the first time, really, that I have even attempted anything like this, but I must admit there was something endlessly more satisfying in creating something this complete compared to mere separate phases of repainting, rerooting and sewing. A design of a doll where all those aspects of OOAK (One of a kind) doll making coming to together in a well planned look with hair, make up and wardrobe made just for this doll. It was quite like publishing a FR doll of my very own. I liked it.

The wardrobe of this doll celebrated the current fashion trends of grey and sheer. As presented in the picture above, the wardrobe includes three sets of clothing common to most FR girt sets that inspired my work.
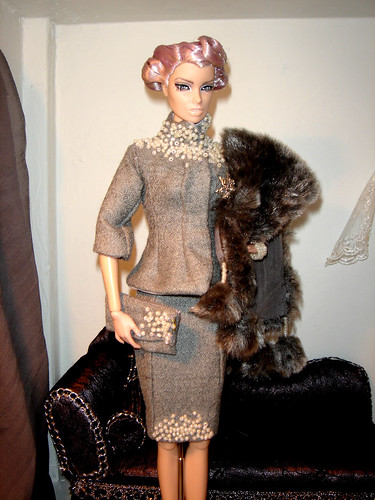
My original inspiration was the business suit. I had acquired a small amount of the finest wool ever imaginable when I was interpreting for my spouses sister as we shopped for fabrics in China. What ever she bough I got a small provision - namely half a meter of every luxurious fabric!
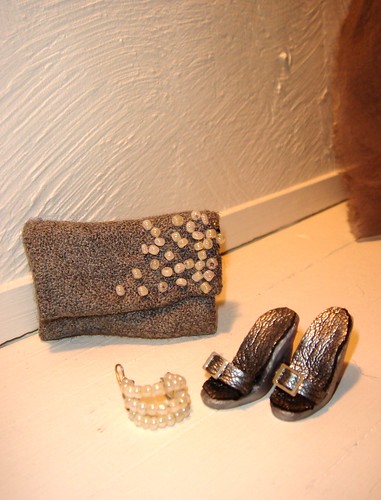
This perfect grey wool was perfect for the suit. I used a figure adoring cut, that made the jacket a nightmare to make. This one is the third version, the first two ending up as momoko and MB clothing. The jacket and the pencil skirt are both fully lined and then hand applied with pearl coloured beads. I also made a matching clutch handbag and pearl bracelet to complete the look as well as simple silver bumps and a luxurious faux fur stole.
As thiss was suppose to be a gift set style wardrobe there had to be a long gown - even though I´m not a gown person at all. For some reason I just don´t like my dolls posing in evening gowns, instead I prefer them in something that could be worn on high street - but that is still far from casual! Ok, got carried away again, the gown. For the gown I chose a grey silk chiffon that obviously without any lining would be an outrageous thing for a real person to wear, but that is the whole point and fun of dolls - they can!
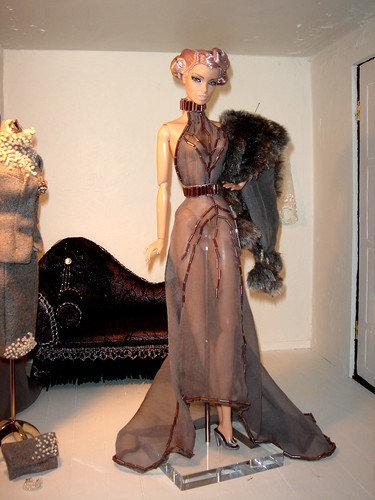
For the strategic places I used more beads for censorship. Well, its still obvious the gown covers all but hides nothing, but I suppose I´ll just have to create a character well suited for such questionable behaviour. ;) The fur stole made for the business suit works well with the sheer gown as well.
Normally the gift sets have lingerie as the third outfit, but I wanted this character to be of mature age and though a night gown prudent no matter how vague the morals of the person were - as Finnish maxim says: "Age does not arrive alone". So instead of bra and panties or sexy corsets I made a 20´s style sheer lace night gown with matching panties.

As before, the outfit was decorated with hand applied beads, but this time used in moderation - only scattered around the cleavage and sleeves. The tiny beads are almost invisible but yet give the gown that distinct feeling of luxury.
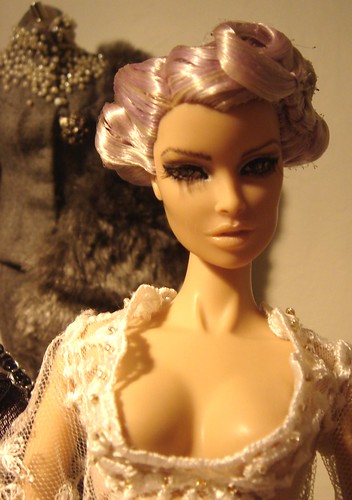
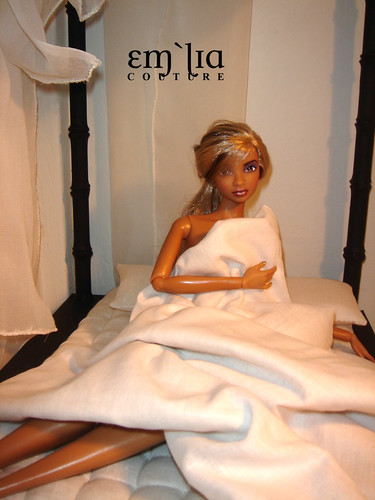
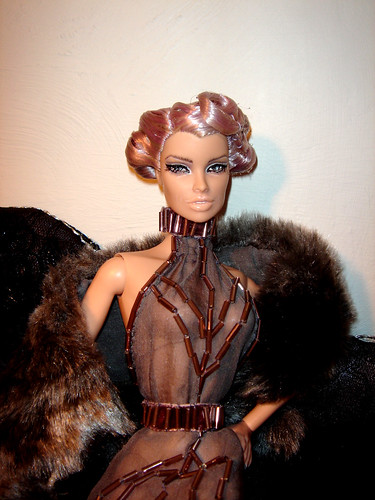
Vanessa was rerooted using KatSilk saran fibre in the mother of pearl colour called the "Opal Essence". The famous hairstyle was inspired by the FR " A Fashionable Life" Vanessa, that is considered the most beautiful Vanessa doll ever made by most FR collectors worldwide. I must say this hairstyle was a nightmare to make and I will never ever attempt it again.
I had set my mind upon it and tried without success for hours and hours until I got it looking like this. And this, mind you, is nothing even close to the AFL Vanessa´s perfect up do. First of all, the side part is on the wrong side. This is mainly because the doll I used had had a side part on thast side that was rooted for tight rerooting it might risha fractured "skull", so I made the decision to reroot the parting on the other side. Second, I just could not get the hair as tidy as the factory style on AFL Van. Just couldn´t. Impossible. Maybe I´m just bad at this or something. Anyway, if anyone ever askes me to do a commission with this hairstyle, I just say I´m not talented enough to do it. Sigh. :(

The face up was done, as usual, using fine artist acrylics and completed with faux lashes. HGE Vanessa has grey eyes, nude lips and some tiny age lines around her mouth and eyes. I wanted to paint a portrait of a woman well aged, but yet powerful and full of rigour. I will be writing her character profile when it comes to me, and it will be updated to my flickr "FR character profiles" set in:
http://www.flickr.com/photos/emiliacouture/sets/72157606266758910/
This Vanessa doll is the first one in my FR collection. I bought the doll completely blank with not face or hair and transformed her into a complete and luxurious OOAK gift set. Its the first time, really, that I have even attempted anything like this, but I must admit there was something endlessly more satisfying in creating something this complete compared to mere separate phases of repainting, rerooting and sewing. A design of a doll where all those aspects of OOAK (One of a kind) doll making coming to together in a well planned look with hair, make up and wardrobe made just for this doll. It was quite like publishing a FR doll of my very own. I liked it.
The wardrobe of this doll celebrated the current fashion trends of grey and sheer. As presented in the picture above, the wardrobe includes three sets of clothing common to most FR girt sets that inspired my work.
My original inspiration was the business suit. I had acquired a small amount of the finest wool ever imaginable when I was interpreting for my spouses sister as we shopped for fabrics in China. What ever she bough I got a small provision - namely half a meter of every luxurious fabric!
This perfect grey wool was perfect for the suit. I used a figure adoring cut, that made the jacket a nightmare to make. This one is the third version, the first two ending up as momoko and MB clothing. The jacket and the pencil skirt are both fully lined and then hand applied with pearl coloured beads. I also made a matching clutch handbag and pearl bracelet to complete the look as well as simple silver bumps and a luxurious faux fur stole.
As thiss was suppose to be a gift set style wardrobe there had to be a long gown - even though I´m not a gown person at all. For some reason I just don´t like my dolls posing in evening gowns, instead I prefer them in something that could be worn on high street - but that is still far from casual! Ok, got carried away again, the gown. For the gown I chose a grey silk chiffon that obviously without any lining would be an outrageous thing for a real person to wear, but that is the whole point and fun of dolls - they can!
For the strategic places I used more beads for censorship. Well, its still obvious the gown covers all but hides nothing, but I suppose I´ll just have to create a character well suited for such questionable behaviour. ;) The fur stole made for the business suit works well with the sheer gown as well.
Normally the gift sets have lingerie as the third outfit, but I wanted this character to be of mature age and though a night gown prudent no matter how vague the morals of the person were - as Finnish maxim says: "Age does not arrive alone". So instead of bra and panties or sexy corsets I made a 20´s style sheer lace night gown with matching panties.
As before, the outfit was decorated with hand applied beads, but this time used in moderation - only scattered around the cleavage and sleeves. The tiny beads are almost invisible but yet give the gown that distinct feeling of luxury.
Vanessa was rerooted using KatSilk saran fibre in the mother of pearl colour called the "Opal Essence". The famous hairstyle was inspired by the FR " A Fashionable Life" Vanessa, that is considered the most beautiful Vanessa doll ever made by most FR collectors worldwide. I must say this hairstyle was a nightmare to make and I will never ever attempt it again.
I had set my mind upon it and tried without success for hours and hours until I got it looking like this. And this, mind you, is nothing even close to the AFL Vanessa´s perfect up do. First of all, the side part is on the wrong side. This is mainly because the doll I used had had a side part on thast side that was rooted for tight rerooting it might risha fractured "skull", so I made the decision to reroot the parting on the other side. Second, I just could not get the hair as tidy as the factory style on AFL Van. Just couldn´t. Impossible. Maybe I´m just bad at this or something. Anyway, if anyone ever askes me to do a commission with this hairstyle, I just say I´m not talented enough to do it. Sigh. :(
The face up was done, as usual, using fine artist acrylics and completed with faux lashes. HGE Vanessa has grey eyes, nude lips and some tiny age lines around her mouth and eyes. I wanted to paint a portrait of a woman well aged, but yet powerful and full of rigour. I will be writing her character profile when it comes to me, and it will be updated to my flickr "FR character profiles" set in:
http://www.flickr.com/photos/emiliacouture/sets/72157606266758910/