Hi. It's been a while. After winning the Couture Doll Design Challenge I've been experiencing a sort of a creative dry season, but finally it's beginning to pass. Moving to a new city certainly didn't help as we have accumulated quite a pile of stuff and being rather penniless students we had to carry the whole truckload ourselves - luckily we have such a wonderful families they came to help out.
Anyway, yesterday I finally got an inspiration to make something new for my diorama that I had neglected since Summer. My hubby had printed me some photos he took during his study-trip to Paris as huge backdrops and the way the backdrop meets the floor bothered me. So, what I wanted was a an ancient looking stone wall to cut the view in half. I chose blue Styrofoam as the building material as its light, easy to paint and has much smoother grain then the white Styrofoam. To decide the perfect height for the wall I used one of my FR Homme. As the dolls are rather tall in 6th scale I actually asked my hubby how hight did the usual stonewalls appear to him - as I'm so short my view wouldn't help much! ;)
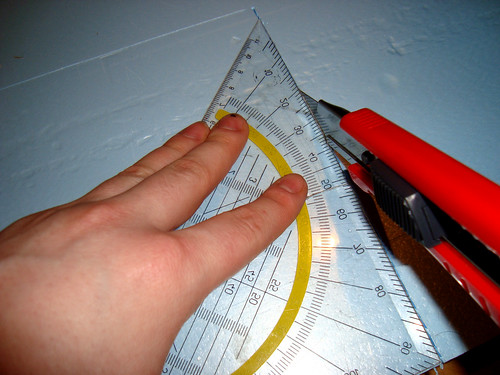
I used a ruler to cut half way into the Styrofoam and then just hit the sheet against my knee to brake it. This way you don't need anything to protect the surface you're working on (lazy).
I used a regular pencil to sketch the stone-pattern to the Styrofoam. Instead of actually carving the Styrofoam its much easier - and much less messy - to use pencils or etc to force the lines into the material.
I used chains and other stuff I found lying around to beat the Styrofoam to give it uneven rock-like surface. You can add more texture when ever you want as long as its before painting.
After the stone-patterns were done I edged them deeper with a chisel. Instead of just cutting the lines deeper I also used the chisel to press the cracks into the rocks and sort of round the edges so the stones seem more loosely piled.
I made a couple of deeper set rocks by cutting the rock loose and pushing it deeper to the sheet. Then I cut off the excess material. Again, this is much less messy and gives a better effect than carving off a piece.
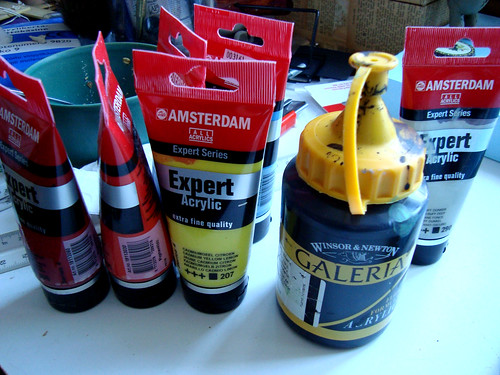
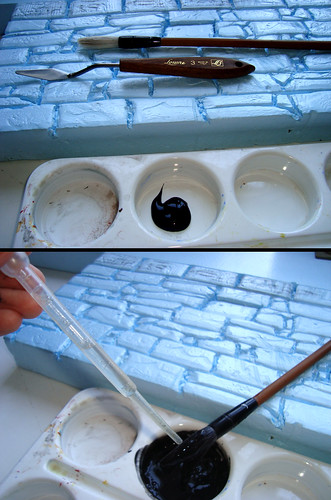
And now to the painting phase: I used regular acrylics to mix the paint for the wall. There is no point of using the more expensive acrylics used for doll faces to paint scenery, so I recommend any old stuff used for poster painting etc. that comes in a good sized tube.
Dilute the acrylic paste with water so even the tiniest cracks are filled with colour. I started out with black base, but in retrospect the contrast might be too much giving a sort of comic book effect instead of realism. I recommend starting with dark grey or brown depending of the colour scheme you want your wall to be.
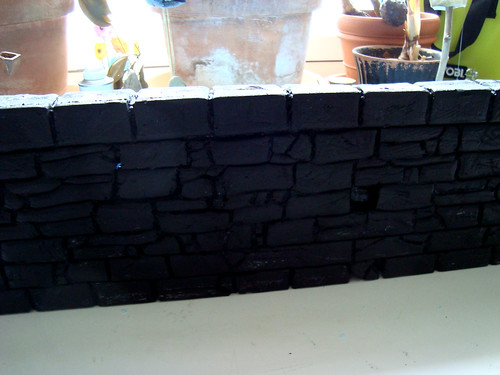
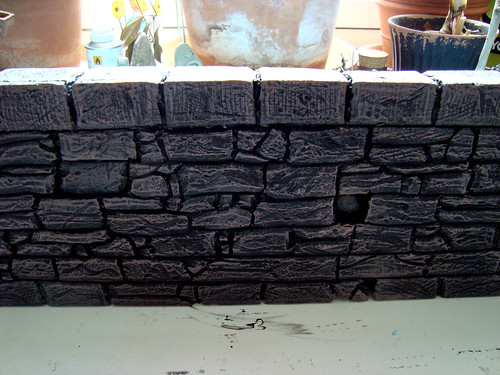
Below you'll see my wall painted all black. This took about 3 layers to get this coverage. Naturally the less you dilute the paints the more they cover, but then it's going to be hard to get that thick paint into the tiny cracks of the wall.
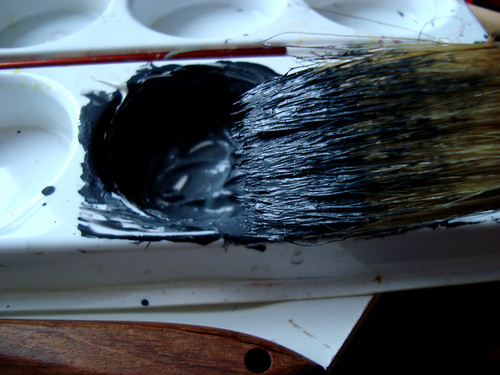
Dry brushing is a method of highlighting the texture and creating artificial shadows to a miniature item. Tap your brush gently in the paint and then dry it by brushing a paper. Then decide the direction of the light and brush down from that direction, touching up all the highest places of the texture.
The effect to one layer of dry brushing.
Then, one by one, mix lighter shades and repeat the dry brushing. You'll get the best results with 4-5 layers. Remember to keep both your paint and brush really dry and test the brush on paper before each stroke.
Wall after 5 layers of dry brushing. As you can see the contrast is rather strong so it's better to start with a lighter shade.
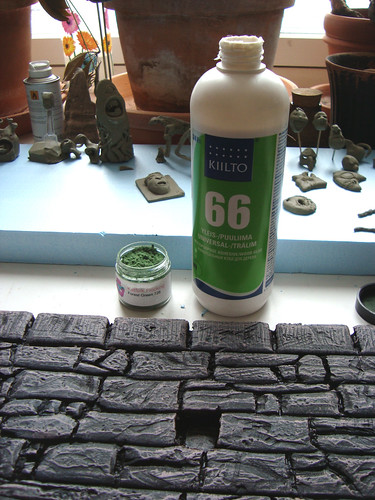
To add a more natural effect and a bit of age to my wall I wanted to give it a touch of moss here and there. For the moss I use green flock - the same stuff I use for doll hair, from restoredoll.com) and ordinary wood glue (Elmer's will do fine).
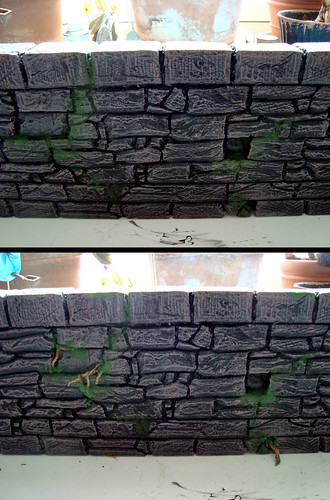
The method of flocking the wall for moss is exactly the same as flocking doll hair. Depending from the thickness of the glue layer you'll either get a hint of moss or real patches of it. I started out just tapping the glue gently on the wall and added the first layer of green flock. Then I repeated the treatment in places with more generous amounts of glue to get thicker patches of moss.
To give a final effect I added some roots (from my dead bonsai) poking out of the cracks between the rocks.I think I might add some patina later on to make it feel more real and urban. Maybe some street dust, bird poop and graffiti, but for now this will have to do.
Here is the stonewall finished and in it's place in my diorama:
Hope you enjoyed this and will try it at home!